Week2 Microcontrollers and sensors
Lab1 Digital Input and Output
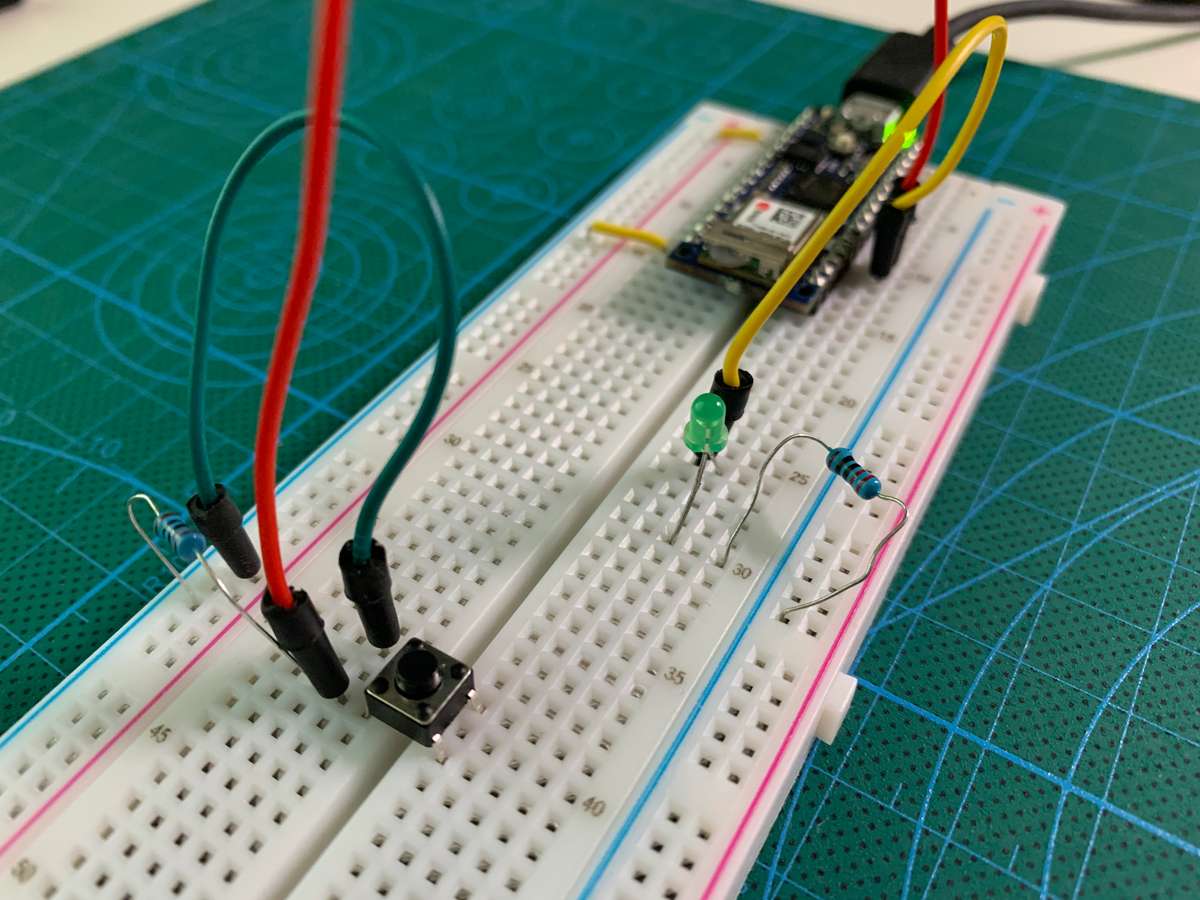
The first lab is to use a button as an input to control a LED. The button has a 10k pull-down resistor. So the arduino reads LOW for normal, and when I press the button, the voltage will feed in and the arduino reads HIGH.
const int inputPin = 2;
const int ledPin = 3;

void setup() {
  pinMode(inputPin, INPUT);
  pinMode(ledPin, OUTPUT);
}

void loop() {
  int value = digitalRead(inputPin);

  digitalWrite(ledPin, value);
}
Make it latch
Buttons are momentary switches, which means they only connect when pressed. It could be very intersting to make them latch. I was having this idea of ‘press to switch’. Something like turn on when I press the button, and turn off if I press again.
Attempt 1
This is my first attempt. It works!(Kind of). But the problem is when I press the button, the ‘value’ variable will be set to HIGH. so the variable ‘state’ will be switching from HIGH and LOW again and again.
const int inputPin = 2;
const int ledPin = 3;
int state = LOW;

void setup() {
  pinMode(inputPin, INPUT);
  pinMode(ledPin, OUTPUT);
}

void loop() {
  int value = digitalRead(inputPin);
  if (value == HIGH) {
    state = !state;
  }

  digitalWrite(ledPin, state);
}
Attempt 2
By adding a new variable ‘lastValue’, and a short delay. The program now only switch the state when it reads a specific input sequence like this:
- Low
- HIGH
- ( wait 50ms )
- also HIGH
If you want to learn more about why adding a 50ms delay, here is a very nice tutorial https://www.arduino.cc/en/Tutorial/Debounce. It also uses millis() instead of delay() to count time so as not to slow down the whole loop process.
const int inputPin = 2;
const int ledPin = 3;

int state = LOW;
int lastValue = LOW;

void setup() {
  pinMode(inputPin, INPUT);
  pinMode(ledPin, OUTPUT);
}

void loop() {
  int value = digitalRead(inputPin);

  if (value == HIGH && lastValue == LOW) {
    // debounce delay
    delay(50);

    if (digitalRead(inputPin) == HIGH) {
      state = !state;
    }
  }

  digitalWrite(ledPin, state);
  lastValue = value;
}
Here is the final result. It works perfectly.

Lab2 Analog Input
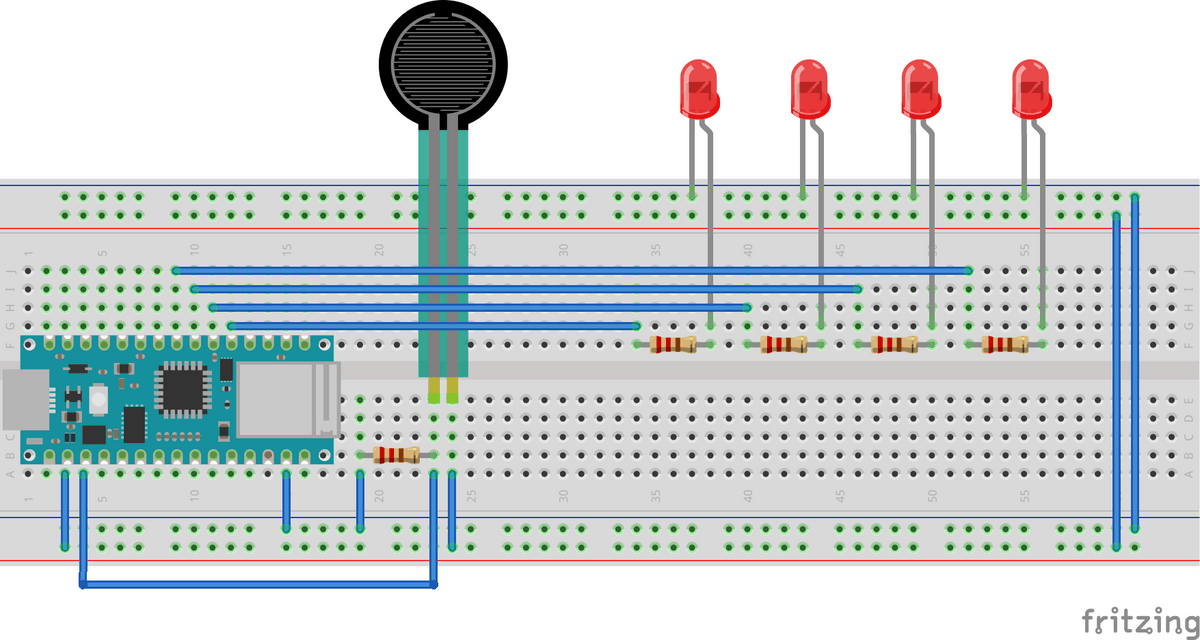
Inspired by the well-knowned carnival game - High striker, I made a simplified version of that. So depend on the force you act on the sensor, it will light different number of LEDs. The stronger you are, the more LED turns on.
Schematic and codes are shown below:
const int ledPin1 = 5;
const int ledPin2 = 4;
const int ledPin3 = 3;
const int ledPin4 = 2;

const int readPin = A0;

void setup() {
  pinMode(ledPin1, OUTPUT);
  pinMode(ledPin2, OUTPUT);
  pinMode(ledPin3, OUTPUT);
  pinMode(ledPin4, OUTPUT);
}

void loop() {
  int value = analogRead(readPin);

  if (value > 200) digitalWrite(ledPin1, HIGH);
  else digitalWrite(ledPin1, LOW);

  if (value > 400) digitalWrite(ledPin2, HIGH);
  else digitalWrite(ledPin2, LOW);

  if (value > 600) digitalWrite(ledPin3, HIGH);
  else digitalWrite(ledPin3, LOW);

  if (value > 800) digitalWrite(ledPin4, HIGH);
  else digitalWrite(ledPin4, LOW);
}
Demo Video: